Cascading Style Sheets (CSS)
Why use CSS?
To describe the look and formatting of a document written in a markup language, eg. hypertext markup language (html)

We can change the colors, sizes, positions, and formatting of any of our HTML elements including the body, paragraphs, links, and images
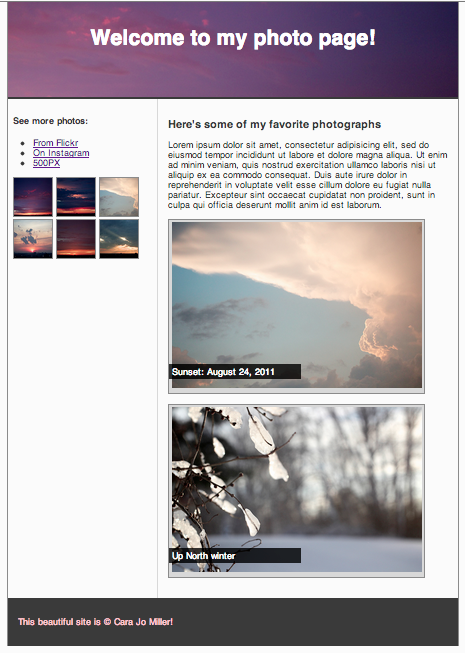
What does it look like
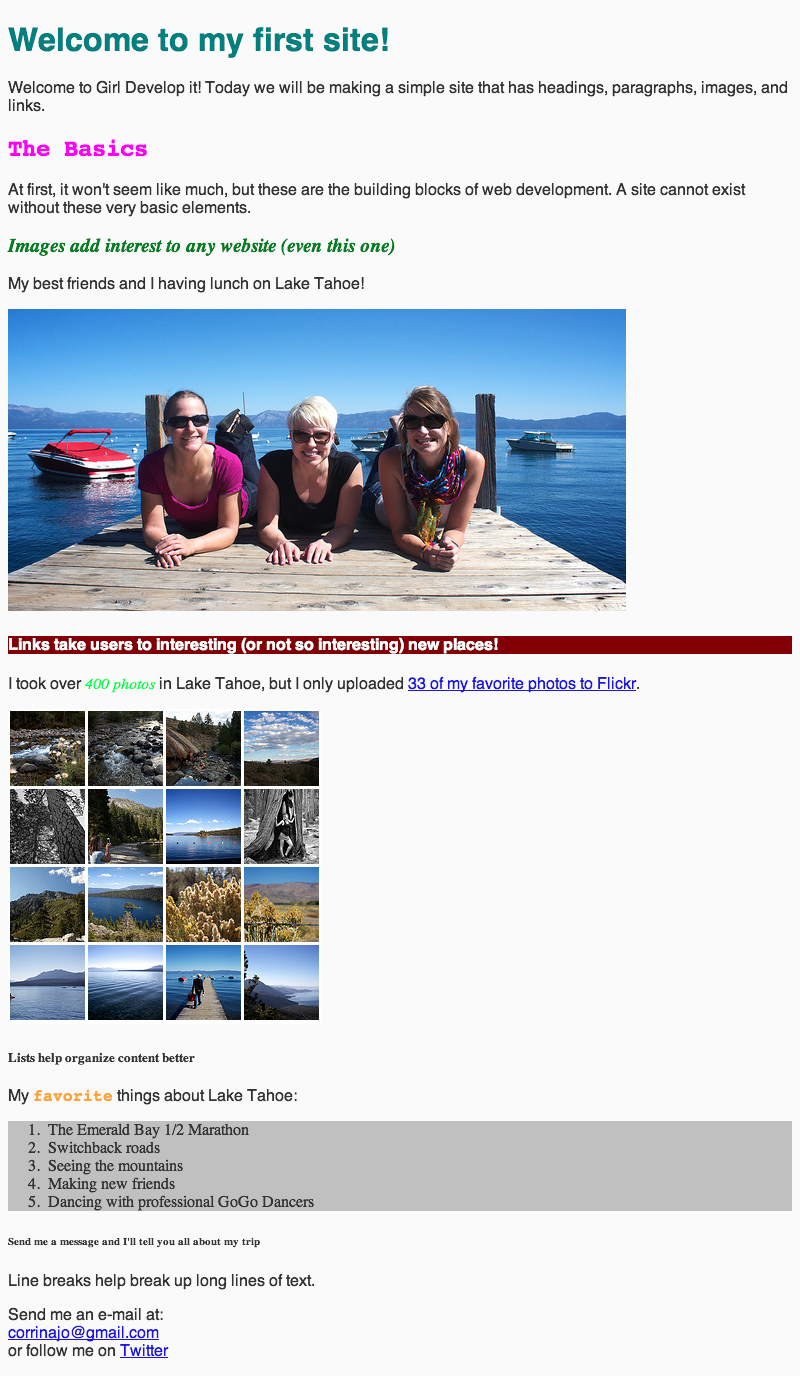
What will we be building?
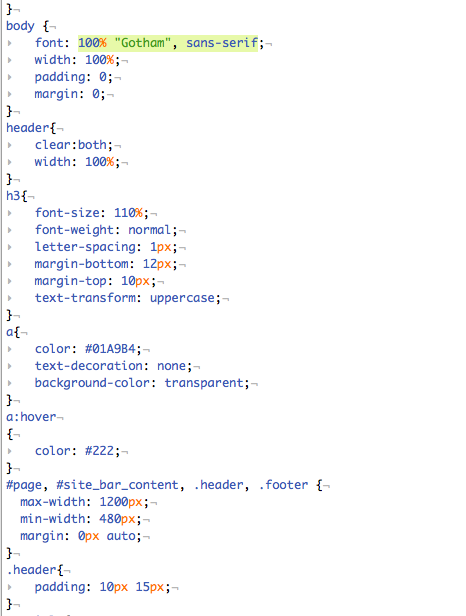
CSS syntax
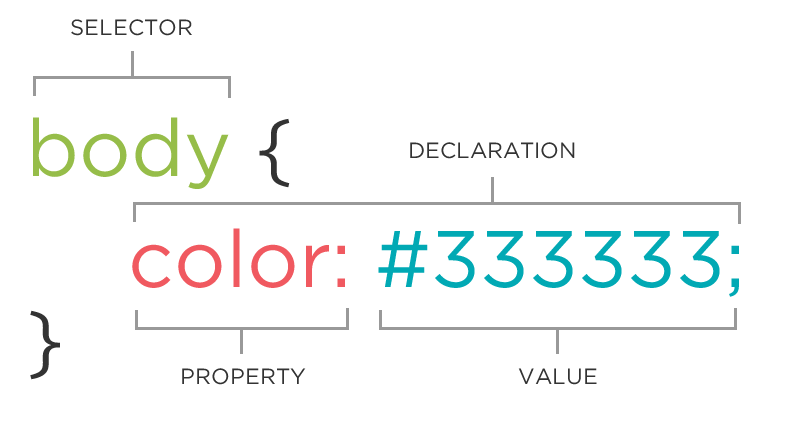
Behold:
Godric Gryffindor
Godric Gryffindor
samewebsite/page1.html
        Jake


        Cassie


        Ax
samewebsite/page2.htm
        Tobias


        Rachel


        Marco
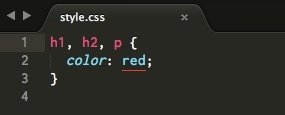
style.css
let's create a new file with the extension .css so we can keep all of our styles there
Let's break this down:
<link rel='stylesheet' type='text/css' href='style.css'>
Let's take a closer look at these styles in our browsers.
Property: color
      p {
        color: red;
        color: #ff0000;
        color: rgb(255, 0, 0);
      }
The color property changes the color of the text.
Color name
Hexadecimal value
RGB value
Named colors such as: black, blue, gray, green, purple, white, etc.
Property: background-color
The background-color property changes the color of the background.
      p {
        background-color: black;
        background-color: #000000;
        background-color: rgb(0,0,0);
      }
Property: font-family
The font-family property defines which font is used.
      p {
        font-family: 'Times New Roman';
        font-family: serif;
        font-family: 'Arial', sans-serif;
      }
Specific font name
Generic name
Comma-separated list
Property: font-size
The font-size property specifies the size of the font.
      p {
        font-size: 12px;
        font-size: 1.5em;
        font-size: 100%;
      }
Pixels
'em'
Percentage
Property: Fonts (shorthand)
      p {
        font-style: italic;
        font-weight: bold;
        font-size: 10px;
        font-family: sans-serif;
      }
OR
      p {
        font: italic bold 10px sans-serif;
      }
Gasp!
but what if i have list items that I want to make different colors?
What then?
- Yellow
- Green
- Blue
IDs
- IDs are unique
- Each element can have only one ID
- Each page can have only one element with that ID
Classes
- Classes are not unique
- You can use the same class on multiple elements.
- You can use multiple classes on the same element.
IDs
-
Yellow Zest
-
Green Apple
-
Blueberry
Classes
        #green-apple {
          color: rgb(0, 255, 0);
        }

        #blueberry {
          color: rgb(0, 0, 255);
        }
          .navigation {
            list-style: none;
          }

          .navigation-link {
            font-size: large;
          }
div
- A block element
- Starts on a new line and stretches out to the left and right as far as it can
- The same way <p> tags work
span
- An inline element
- Can wrap some text inside another element
- Works the same way as an <a> tag
div
            Content


            Content


            Main Heading
span
Paragraph with yellow text.
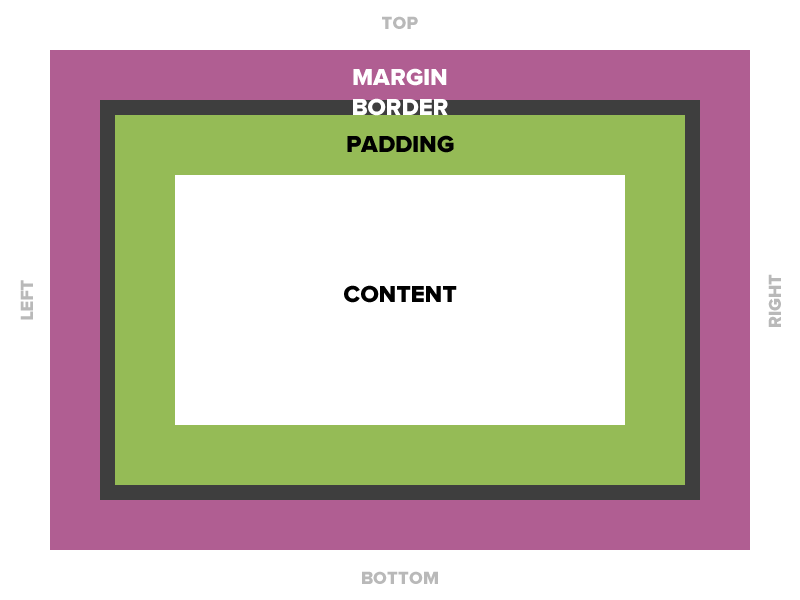
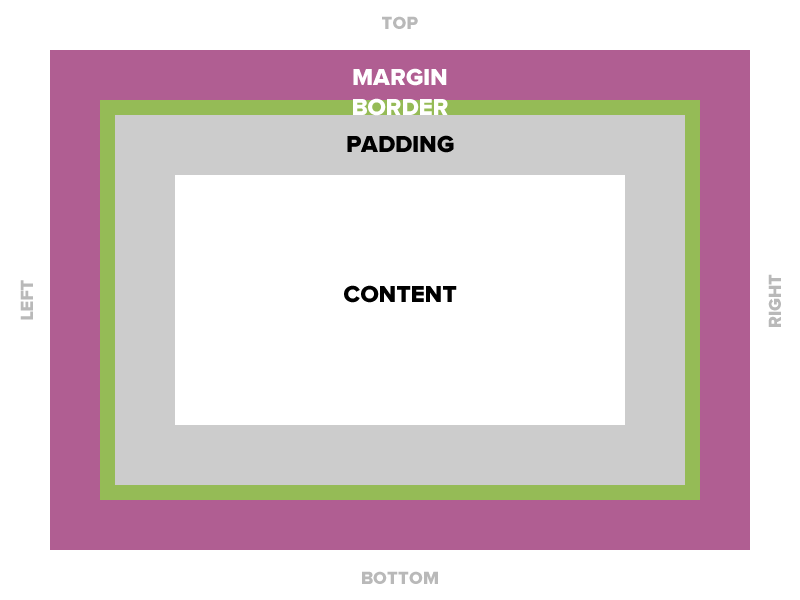
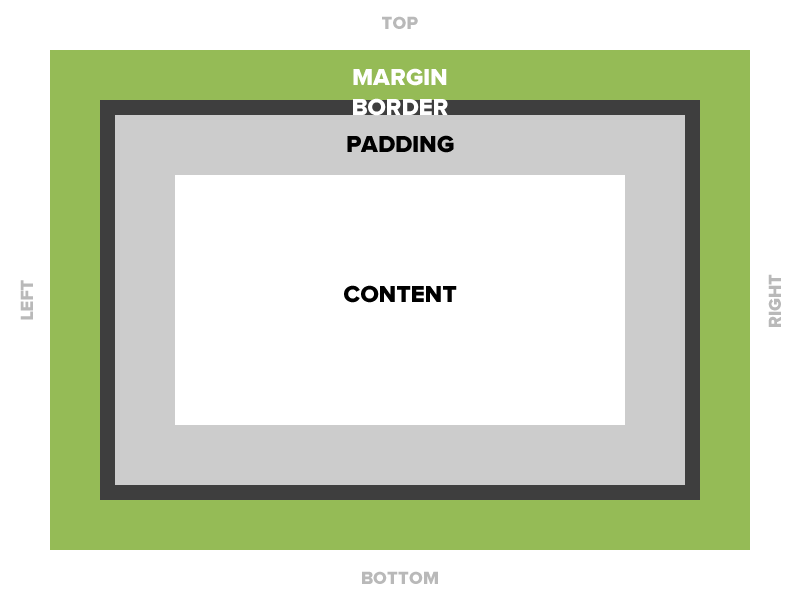
Box Model
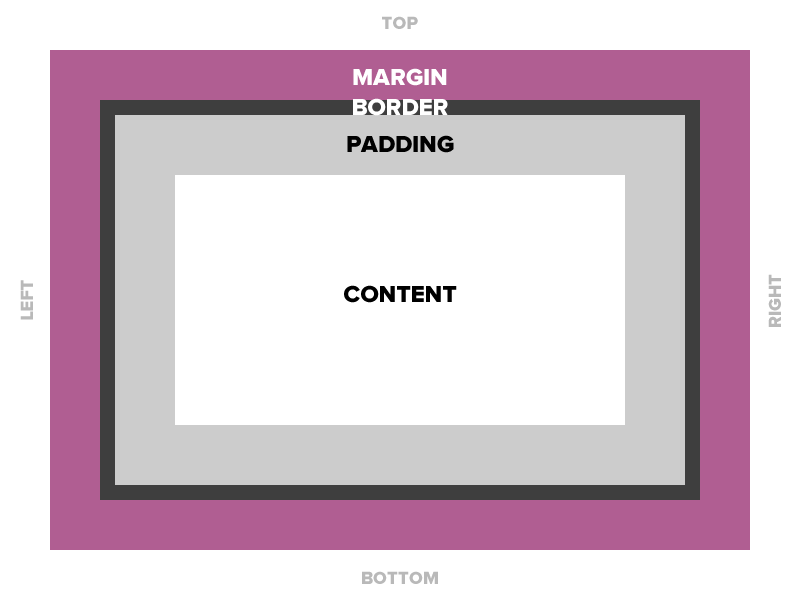
padding
Space between the border and the content
Adds to the total width of the box.
padding
        /* 15 pixels on all sides */
        padding: 15px;

        /* 10 pixels on top only */
        padding-top: 10px;

        /* 10 on top, 5 on right, 3 on bottom, 5 on left */
        padding: 10px 5px 3px 5px;
padding
        /* One value */
        padding: all;

        /* Two values */
        padding: top/bottom right/left;

        /* Four values */
        padding: top right bottom left;
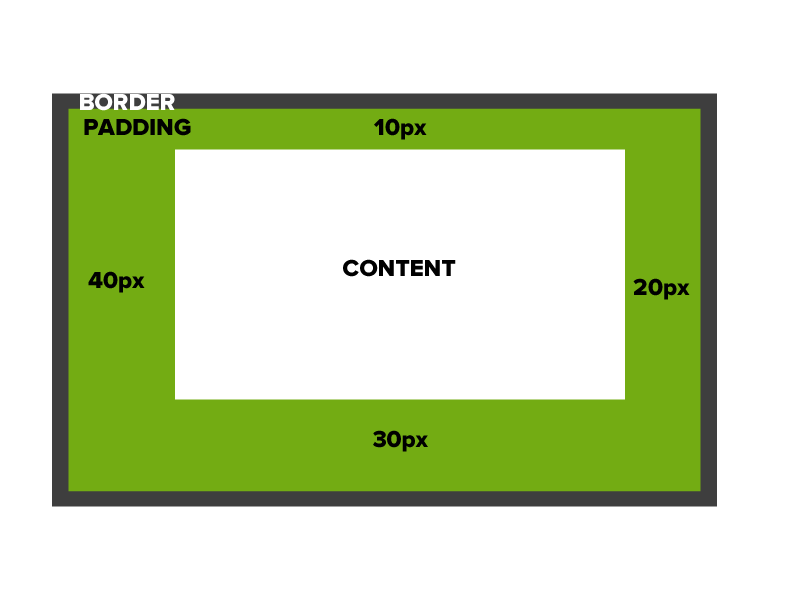
padding
padding: 10px 20px 30px 40px;
Border
The edge around the box, specified as 'thickness, style, color.'
border
        /* a solid red border */
        border: 1px solid #ff0000;

        /* a thick dotted black top border */
        border-top: 4px dotted rgb(0, 0, 0);
border - Other Properties
        border-width: 10px;
        border-style: dashed;
        border-color: #666666;
You can specify each property separately, or all three together.
margin
The transparent area around the box that separates it from other elements.
margin
15 pixels on all sides
      /* 15 pixels on all sides */
      margin: 15px;

      /* 10 pixels on top only */
      margin-top: 10px;

      /* 10 on top, 5 on right, 3 on bottom, 5 on left */
      margin: 10px 5px 3px 5px;
Auto margin
If a margin is set to auto on a box that has width, it will take up as much space as possible.
Centered
        width: 300px;
        margin: auto;
Flush Right
        width: 300px;
        margin-left: auto;
        margin-right: 5px;
Let's Develop it!
Let's add some padding, borders, and margins to our divs.
Let's center our entire document in the browser.
Property: width
Sets the width of an element.
Does not include padding or borders, remember these add to the width.
Property: height
Sets the height of an element.
Does not include padding or borders, remember these add to the width.
Let's develop it!
Add a width & height to our divs.
Use IDs to target each div with CSS
Selector: Descendant
      p em {
        color: yellow;
      }
Selects all em elements that are within a paragraph
This is important.
Let's find ourselves a splash image!
https://unsplash.com/

style.css
        body {
          background-attachment: fixed;
          background-image: url(milkway_splash.jpeg);
          background-position: center center;
          background-repeat: no-repeat;
          background-size: cover;
        }
float
- 'Floating' an element takes it in the normal flow, as far to the left or right of it's containing element as possible.
- Any other elements, such as paragraphs or lists, will wrap around the floated element.
- Always specify a width when floating an element, otherwise the element is likely to take up the whole page and not appear floated.
- You can specify a) whether an element is floated or not, and b) which side it floats on.
float: Example
Below a <blockquote> is floated to the left, allowing text to wrap around it on the right
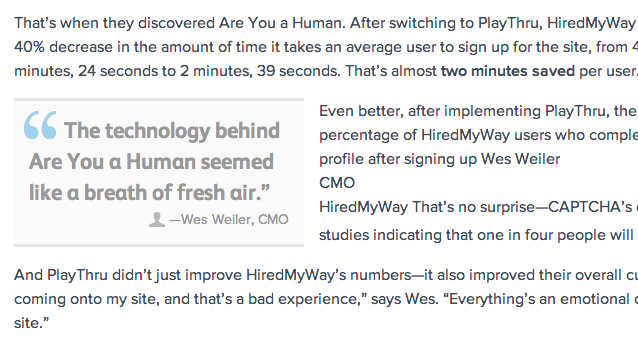
float
        .float {
          float: left;
          width: 200px;
          background: yellow;
        }
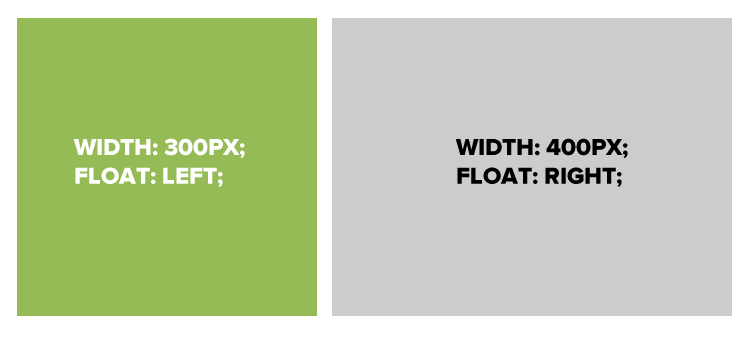
Using floats to place elements side by side
If you want two block level elements to be side by side, you need to float both elements. One left, and one right.
clear
- Clearing tells the element on which side (right, left, both) other elements cannot appear.
- If you had an image floated left, and you did not want the paragraph to appear next to it, you would add clear: left; to the paragraph.
- Clearing both sides makes sure floats don’t flow past the clear element.
        clear: right;
        clear: left;
        clear: both;
clear
        .float {
          float: left;
          width: 50px;
          background: yellow;
        }
        .clear-left {
          clear: left;
        }
Let's Develop It
Let's float our side bar and content areas.
Pseudo-classes, more CSS for links
Changing the format of a link when you hover over it is accomplished by using pseudo-classes.
CSS pseudo-classes are used to add special effects to some selectors.
        selector:pseudo-class {
          property: value;
        }
Example:
        a:link {
          text-decoration: none;
        }
Pseudo-classes, more CSS for links
        /* unvisited link */
        a:link {
          color: #FF0000;
        }
        /* visited link */
        a:visited {
          color: #00FF00;
        }
        /* mouse over link */
        a:hover {
          color: #FF00FF;
        }
        /* selected link */
        a:active {
          color: #0000FF;
        }
Note: order matters
Let's Develop It
Add pseudo classes to your links
Now onto navigation!
Let's start simple
- Remove those ugly bullets
- Make the nav horizontal
- Add a hover effect
        ul.navigation {
          background-color: white;
          display: block;
          list-style: none;
          margin-top: 0;
          width: 100%;
          height: 35px;
        }

        ul.navigation li {
          display: inline-block;
          float: left;
        }

        ul.navigation a {
          color: black;
          display: block;
          padding: 10px;
          text-decoration: none;
        }

        ul.navigation a:hover {
          background-color: black;
          color: white;
        }
Choose one of these three to implement on your own:
- At least two responsive divs
- Make the text on your page look nicer with a simple css trick or two like https://css-tricks.com/viewport-sized-typography/
- Feeling ambitious? Research something on http://codepen.io/ or try http://cssdeck.com/labs/another-simple-css3-dropdown-menu
- Follow along with learnlayout.com
Let's Pause
and look at some beautiful sites created using only HTML and CSS:
